Showing posts with label Born Pretty Store. Show all posts

Vintage Valentine Nail Art

Woohoo, more V-Day nail art! Today's mani is by far one of my all time favorites. I just love vintage-y nail art for Valentine's Day... anytime really. This mani is just so simple but still so elegant. :)


This mani was done with polishes from my Valentine's Day collection (Victorian Romance) and a little help from Born Pretty Store rose decals. I started with a base of My Own Sweet Valentine with an accent nail of Parchment & Lace. Once MOSV was dry I sponged on some Cheeks Tinted Red and a little more MOSV to really blend it together. The shimmer on this gradient was insane! I used top coat on Parchment and Lace and then used a Born Pretty Store water decal. (These decals are only $0.88 right now! Plus if you use the code BPS2014 you'll get 15% off sitewide! I say these are more than worth every penny!!!)
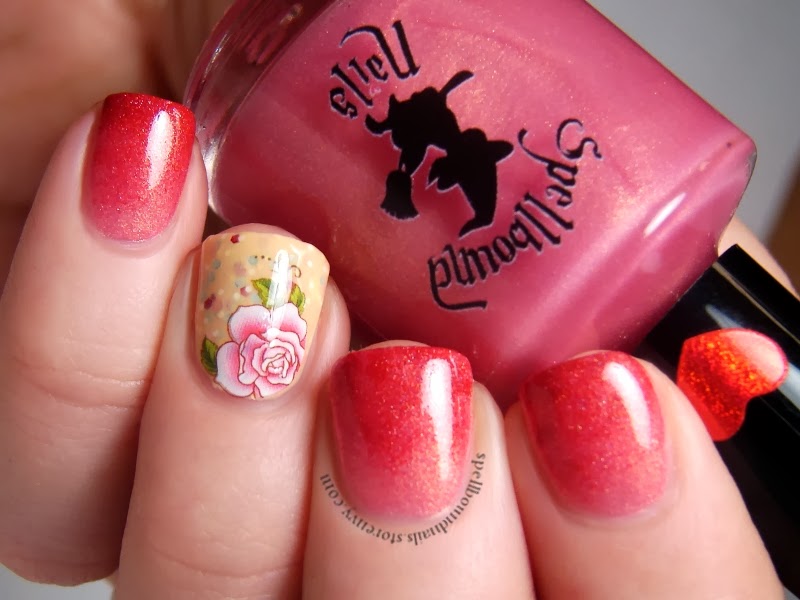

The decal was so easy to use. Just cut it out, dunk it into water (warm water if it's winter) for 10-15 seconds and the decal will slip right off the paper and be easy to position on your nail. I lightly wet the nail and placed the rose. I used a paper towel to blot the excess water and then gently used a finger to press the decal down, getting rid of wrinkles and bubbles until the decal dried completely. Then I topped it with more top coat and it was perfect!!


I couldn't resist trying the glitter of Love & Devotion over the gradient. It's nice, but I found I preferred the simplicity of the gradient alone.

What's your go-to nail art for Valentine's Day?

A Candy Cane Christmas with another Born Pretty Store Stamping Plate

Hello again!! First off, have you entered the giveaways I'm either hosting or a part of yet? If not you can enter here, here, and here. That's a lot of polish you could win; don't miss out! Go on. I'll wait. Done? Okay, onto the nail art!


I really wanted something simple but eye-catching so I started with a base of OPI The Spy Who Loved Me. This polish was a Christmas gift last year but red is always in season around Christmas. What makes this polish even better is the gold shimmer.


In some lights the shimmer will just look red but as you can see here and in the next pic the gold will occasionally show itself. It can be a little shy. :)


This one is a little blurry but it really shows off the gold shimmer.


via BornPrettyStore
To complete this mani, and add just a little more of a Christmas-y touch, I used my new-found stamping skills and added some candy cane stripes in white. This was done using the Born Pretty Store stamping plate M65. If you'll remember I used this stamping plate before to create my Elegant Border Nails. You can buy this stamping plate right now for $2.99. As always feel free to use MLE10W21 for 10% off your BPS orders.

If you don't have and don't want to buy this stamping plate you can always draw the stripes on freehand, use a base coat of white and put down some striping tape before painting on your red, peeling up the striping tape after ... or just use the striping tape itself to create the stripes! All it takes is a little imagination!

Until next time
♥ Ashley

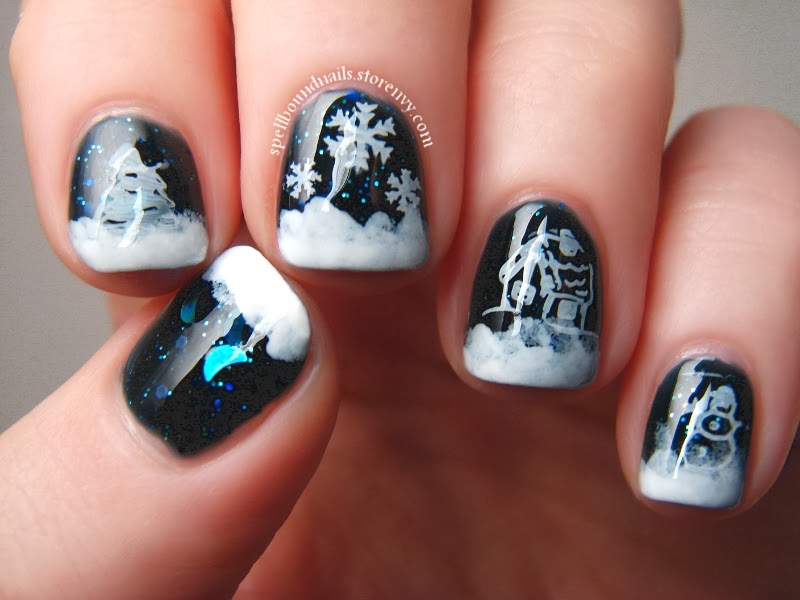
And To All A Good-Night featuring the Born Pretty Store Christmas stamping plate

I was busy mixing polish and filling orders last night when I was suddenly and inexplicably struck with inspiration for some nail art. Maybe it's the Christmas spirit finally kicking in? I'm not real fond of Christmas. Lemme explain! I loved it as a kid - the wonder of going out and picking/cutting/bringing home our own tree, decorating, going for long drives to see Christmas lights; the anticipation on Christmas eve, attempting to sneak out to the living room to see if Santa had come yet ... when finding anything under the tree was a surprise and a delight, but it's just not the same and hasn't been for a long while. And it's not just because I'm not a child anymore. Now-a-days, most kids (and adults are guilty of this too) are all about the receiving - how much their presents are worth and how many they can get ... and most are completely ungrateful. Where's the spirit of good will and charity gone?? So yeah, my reasons for wishing Christmas would come and go quickly.

But my Grinch-like behavior isn't what this post is about. This is about nail art inspiration and my very first truly successful attempt at stamping!


I used 2 coats of And To All A Good-Night from my 'Twas the Night Before Christmas Collection. I put down a layer of top coat and then sponged the tips with basic white. Another layer of top coat and then came the attempt at stamping. You've all seen my previous stamping disasters so I went into this with a cringe on my face. But I read somewhere that you should file the gel bit of your stamper before you use it the first time. Well, I never did this ... didn't know you should, but I figured why not? What's the worst that could happen? The filing could ruin it but it was of no use to me now so worth a shot right? I'm guessing since this attempt at stamping was a roaring success that this does help!


I used my Born Pretty Store stamping plate QA19. I'm pretty sure I received this free last year, just after Christmas, when they did a flash sale/giveaway thing. You can buy it right now for only $0.99! If you'd like to buy this stamping plate or anything else from their site you can always use my 10% off code: MLE10W21. I only had a small amount of trouble with the tree, and that was all my own fault ... I didn't roll the stamper enough on my nail and the tip of the tree didn't stamp. I had to attempt to line it up so it's just a little lopsided. And I did loose a line or two on the house; I don't think you can really tell though.

But overall, I really couldn't be happier. I'm already dreaming of buying some more stamping plates and seeing what other quick and easy designs I can come up with. I don't have time anymore for full out nail art, but I should have time for stamping. :)

#33DC - Day 6 - Texture


Hi everyone, happy Friday!  Hope your week's been good.  I'm back today with Day 6 of the #33DC, and the prompt for today is texture.  When I put this mani together, I only owned 3 textured polishes; however I have bought 7 more in the last 2 weeks!  Never mind, I'm sure I'll find a way to incorporate them into some of the other prompts in the challenge.


Today was actually yet another first for me - stamping over texture, and I can officially say that I really liked it!  This mani is pretty much the reason I have now tripled my textured stash. : D   The funny thing is that my stamping on my thumb and index finger was a total fail.  The image itself only has really thick and hair-thin lines.  Unfortunately, quite a few of those thin ones dried on the stamper, so I decided to see if I could save it before starting again.  I grabbed a really thin brush, and freehanded a few of the thin lines, filled in the bald spots, and made a few of the thin lines on the other nails a little thicker for continuity.  It's not perfect, but I was pretty pleased overall, and it just goes to show that all is not necessarily lost if you screw up the stamping a little bit : D


The polishes I used in this mani were Born Pretty Store textured polish in shade 12.  These are currently on sale for $3.99 (£2.49 to us Brits), and this black one here is shown at 1 coat!  I love one-coaters, they make me very happy : )  And I stamped with (as if you hadn't guessed) Barry m Silver Foil Effects and PUEEN37.


#33DC - Day 3 - Tape Mani

Hi lovely people, happy Friday!  Today is the 3rd day of the 33 day challenge, and the prompt is tape mani.  I can't take full credit for this mani, as I was inspired by this freakin' amazing mani by Missy from Gnarly Gnails.  If you've never seen her blog, you really need to check it out.  She's amazeballs!


I did switch it up a little by having the gradient in the base, and a solid colour for the texture part, but it was that mani that I had in my head whilst working on this.  Amazingly, this wasn't actually what I had planned for this prompt, I was going to use a neon pink under the tape, but I'm really glad I went in this direction as I love this mani.  I didn't want to remove it, but I had other designs I wanted to get ahead on.
I started with 2 coats of W7 Blue Mirror which I picked up from the lovely Debbie Crumpet in a grab bag on facebook.  Once that was touch dry, I used a sponge eyeshadow applicator to sponge on a thin layer of Kleancolor - Metallic Aqua from about two-thirds of the way up the nail, the sponged on a bit of Revlon - Royal (99p here) onto the tips, then added a layer of Seche Vite.  Once that was dry, I added striping tape in a criss-cross pattern, then painted over with Born Pretty Store textured polish in Shade 12, removing the tape immediately, one nail at a time.

I have quite a few photos of this mani, so I'll just spam you with the rest of them here at the bottom.  :D


Mollon Sand & Born Pretty Story Card Decalcs

Morning Ladies!

Quick post to show you this super cool Cards Decalcs for nails I got from Born Pretty Store.
Hoje trago-vos uma nova nailart feita com decalques da Born Pretty Store e o Mollon Sand Anze Lazio.


The Nail Water Decals King Spade Heart Diamond Club Cards Pattern comes with 3 sheets of decals ( link to product) and applies on the nail quite easily. Just remove the outer sheet, place the decals on water for a couple seconds and press it on the nail until the paper comes out. Its done! 
Os Decalques da Born Pretty Store têm um tema de Naipe de Cartas, um Rei de Copas e Os Simbolos dos 4 Naipes. No pacote vêm 3 folhas com desenhos. Para aplicar basta recortar o desenho pretendido, remover a pelicula transparente externa, mergulhar em água por alguns segundos e pressionar na unha até que a parte branca se descole do desenho que ficará impresso na unha. Simples, certo? 


#153 Anze Lazio - Mollon Pro Sand Lacquer Collection


Don't forget that you have a coupon code of 10% Off in every order with free shipping!


Para mais informações sobre preços ou outras questões
Part 1   | Part 2  | Part 3 


See you soon,
Love,


Born Pretty Store - Nail Art Mold & iPhone Case Decoration
Hello ladies !

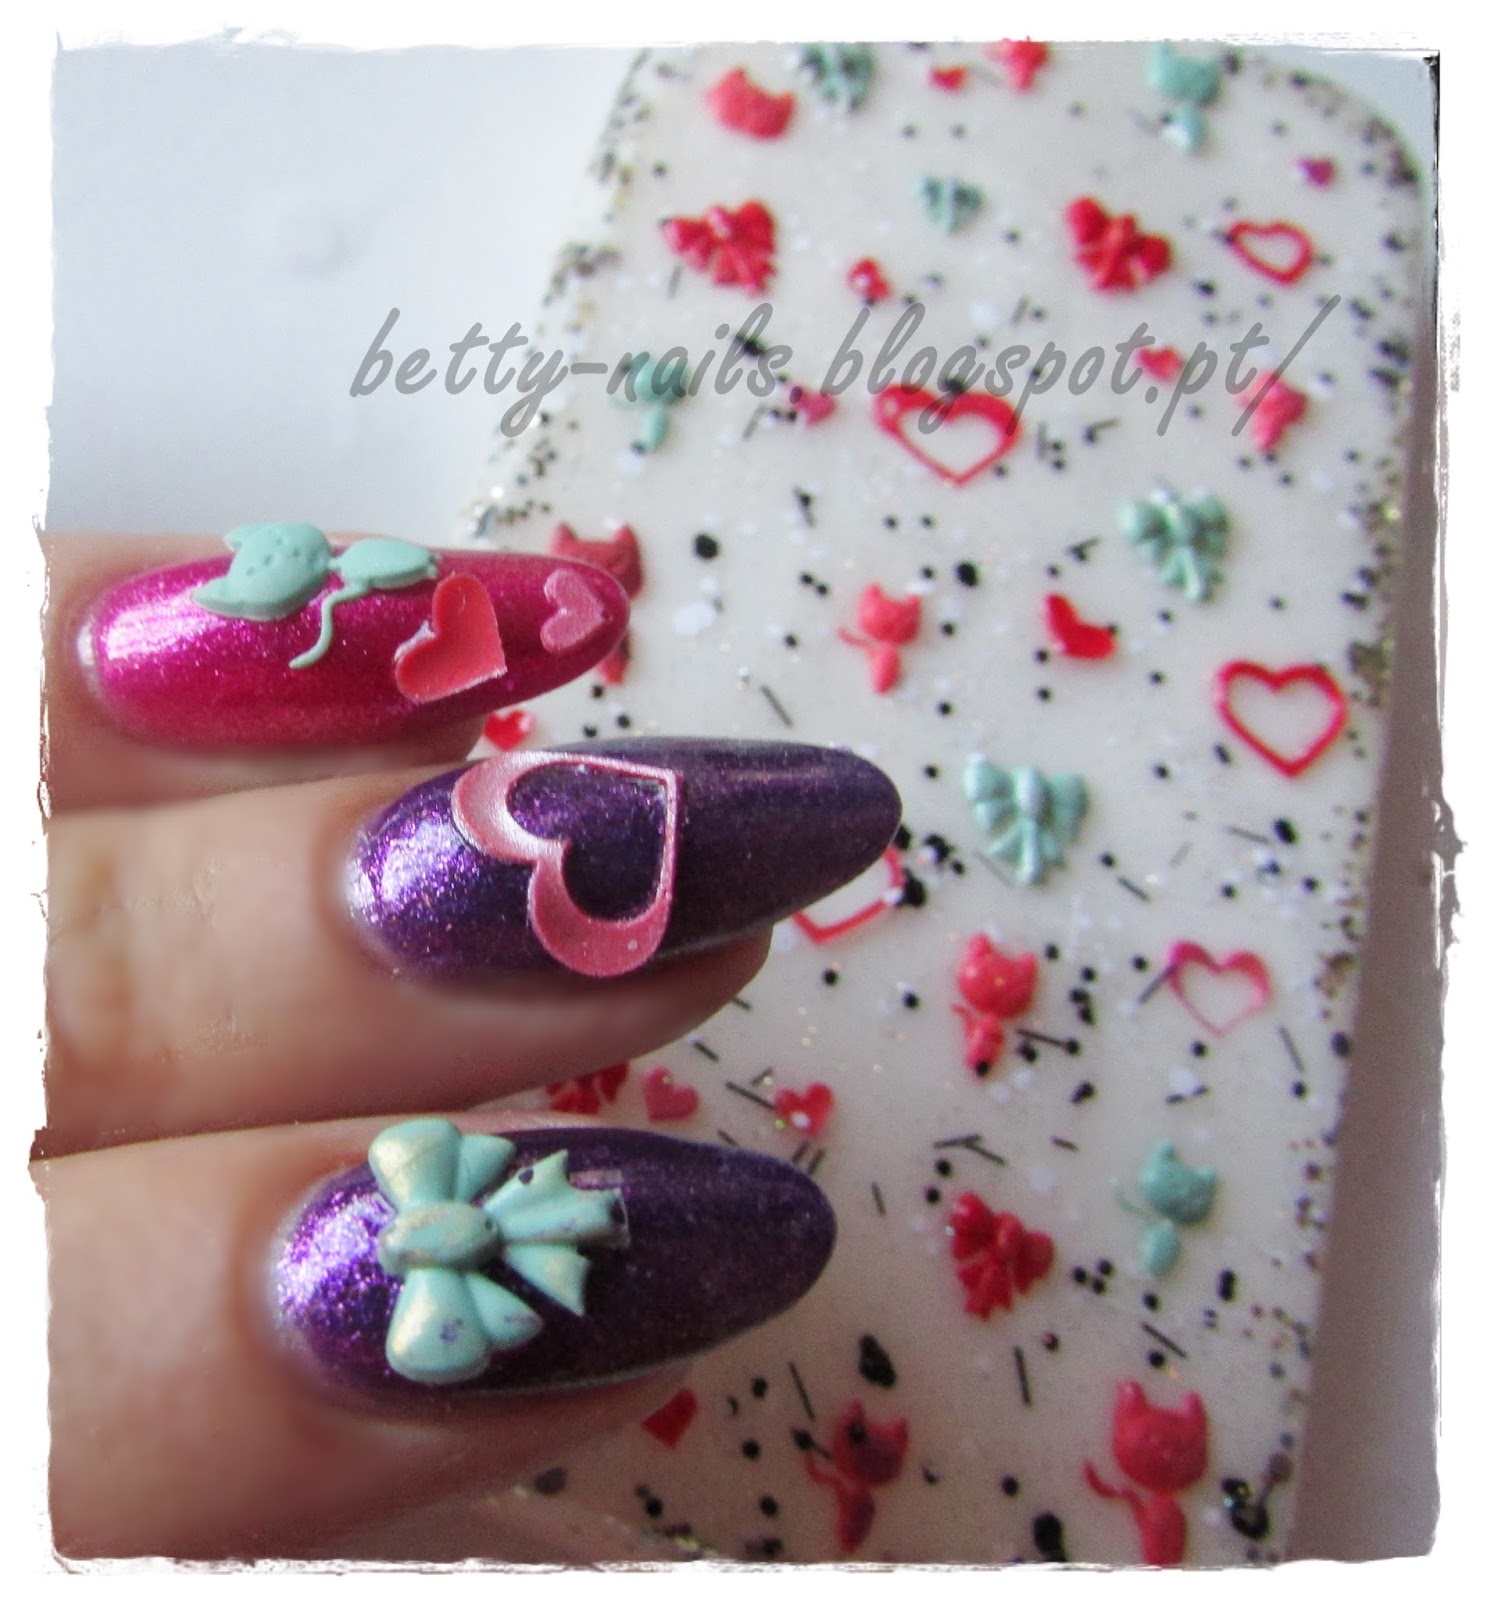
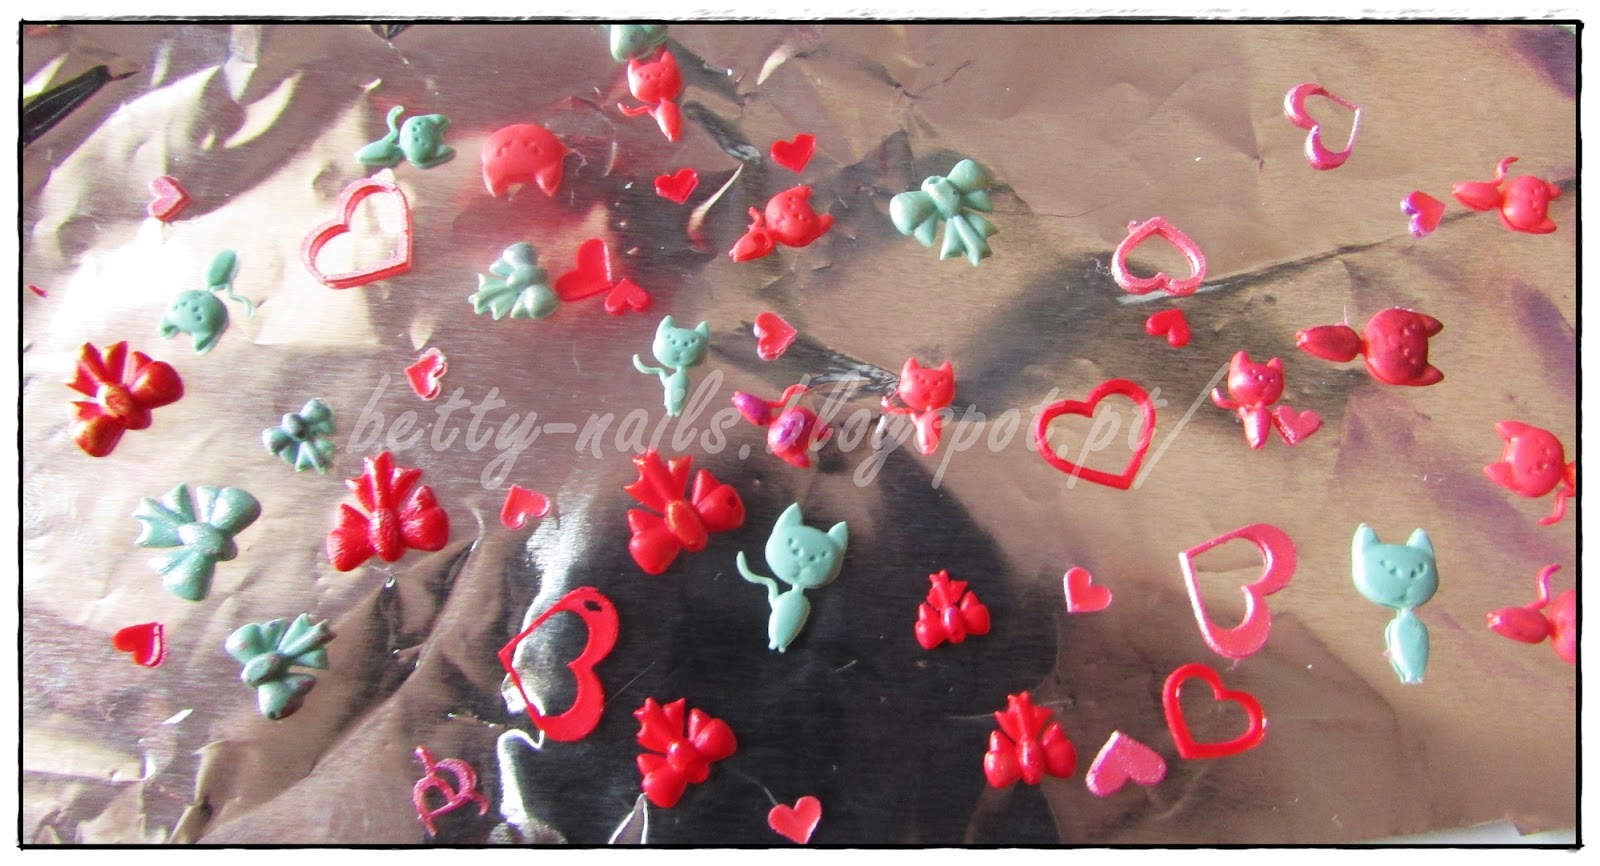
Today I have a cool Nail art Post for you! I hope you like it! I used Born Pretty Store Nail art Molds, LCN Gel Colors and Kinetics Nail polishes! Check out this adventure! 


Don't forget by 10% OFF Coupon Code BDJ61 ! 


The Material


LCN Gel - I love Mint - Hot Chilli & Vintage Rose


How To 

- Apply The Gel on the Mold / Aplicar o gel no molde
- Remove the excess with a card in the same way we remove excess polish from stamping plate / Remover o excesso de gel com um cartão do mesmo modo que se retira o excesso de verniz de uma placa de carimbos. 
- Cure for 5 mins / Levar ao forno UV por 5mins
- Remove the items with some pliers / Remover os items com cuidado e uma pinça de pontas finas. 

The end result / O resultado

The Molds / Moldes


Bowknot Shape Nail Art Mold


Beans Shape 3D Nail Art Mold


Lovely Cat Shape 3D Acylic Nail Art Mold


The final manicure


The iPhone Case


The Polishes


Don't forget by 10% OFF Coupon Code BDJ61 ! 


I hope you enjoyed today's post ! What do you think about this 3D designs? And the case? Would you like a personalized case with polish?  Let me know!
See you soon,

Love,