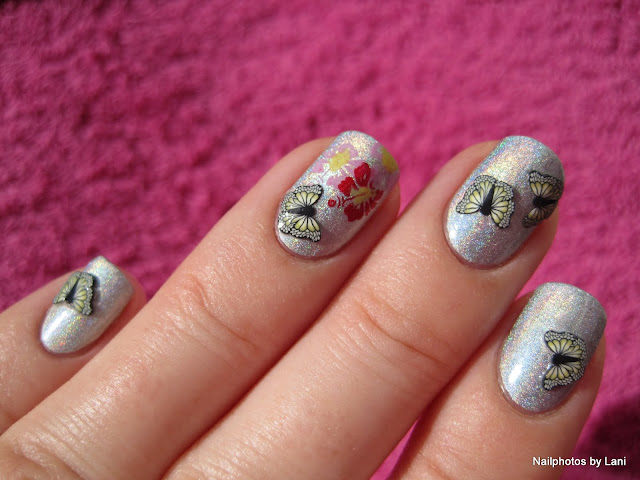
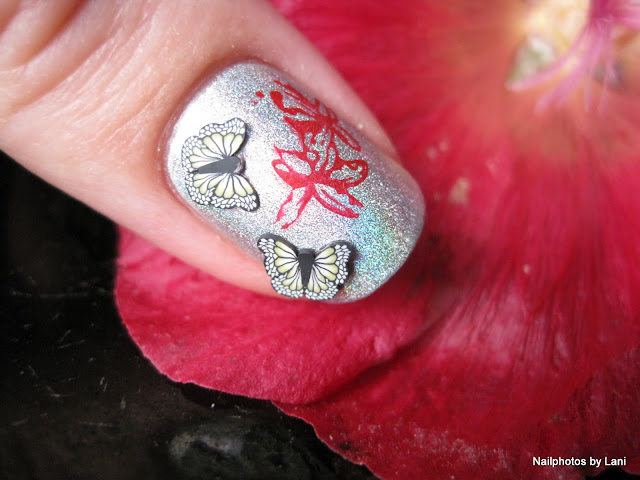
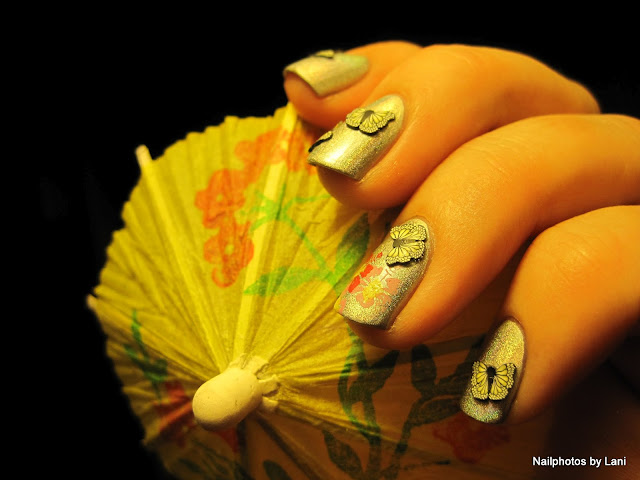
Hawaii nails


Hello everyone!

Hawaii nails


Hawaii reminds me of beautiful nature, lava, palm trees, big waves, surfing, flower necklaces, hula dancing, and a weather with sunshine and a constant pleasant temperature. I hope to go there some time. I only know Hawaii from TV and movies. The latest Hawaii movie I saw was The Descendants, where you see that although one lives in a nice place like Hawaii and looks like Clooney, one has problems like everyone else. And the pineapples on this stamping plate reminds me of Blue Hawaii! Lol! I wish I could have played in that Elvis movie. I would even have been glad to play his mother, like lucky Angela Lansbury.

Hawaii nails
Hawaii nails
Hawaii nails

I have stamped with black Konad stamping polish over my Sunset/ Fall gradient nails with Kleancolor Chunky Holo Candy, using a stamping plate with Hawaii images. I used stamping plate N.NAIL SPPMB26 from KKCenterHk. When I applied the top coat (L.A.Colors), I saw that the black stamped images became even more black.

Hawaii nails
This stamping plate has images of a coconut palm tree, Hawaii rose/ hibiscus (in the middle), other flowers, a pineapple, and the words "Hawaii" and "Aloha!".
Hawaii nails
Hawaii nails
I was going to write that the Hawaiian word Aloha means hello in English. But I googled it, and according to Wikipedia; Aloha in the Hawaiian language means affection, peace, compassion and mercy. Since the middle of the 19th century, it also has come to be used as an English greeting to say goodbye and hello. Currently, it is mostly used in the sense of "hello"

Hawaii nails


If you just want a tropical mani, and don't want the words to show, just don't put polish on that part of the stamping plate, or use a cotton swab/ Q-tips with nail polish remover to erase the word from the stamper.

Hawaii nails


If you want to buy something from KKCenterHk, you can get 10% off with the coupon code Nailphotos by Lani, before 31st January, 2014. (Edited, January, 2013)


When I look at my nails I feel that I should have been in a cocktail party, holding a glass of San Francisco, with coral sand on my feet.

Hawaii nails


I found my "Hawaii background" on facebook, watermarked www.calxibe.com

Lani

0 comments:

Sunset/ Fall gradient nails with Kleancolor Chunky Holo Candy


Hello everyone!

Sunset/ Fall gradient

I finally felt like wearing bright colors. I hardly did that this summer. And now when it's getting colder, I felt that everyone would stare at my very bright colored sunset nails. But when I went for a walk to take some photos of them, I looked at the leafs, and suddenly realized that my nails were more like a fall camouflage!


Sunset/ Fall gradient


Sunset/ Fall gradient

Sunset/ Fall gradient

Sunset/ Fall gradient

Sunset/ Fall gradient

Sunset/ Fall gradient

Sunset/ Fall gradient

Sunset/ Fall gradient

Sunset/ Fall gradient

Sunset/ Fall gradient

Sunset/ Fall gradient

Sunset/ Fall gradient

To make this manicure I used:

IsaDora: #03 Champagne Sorbet
M&M: Yellow (from a mini set) -yellow creme
GOSH: #570 Peachy- orange creme
GOSH: #598 Bubble Gum- pink creme
GOSH: #610 Blissful- red/ dark pink creme
Kleancolor: #228 Chunky Holo Candy
base- and top coats
a sponge
a toothpick
Used for Sunset/ Fall gradient
What I did:

I felt that two coats of the IsaDora didn't give the right base for this, so I covered it with the yellow. Then I used the yellow, orange, pink and red nail polish to make a gradient with the sponge. I used the toothpick to mix the colors on a piece of plastic, like The Nailasaurus shows in this tutorial. The pink was only used to mix with the red. I used the sponge in different ways until I felt that it was good enough.

Making of Sunset/ Fall gradient


Then I applied one coat  of the Kleancolor polish, to even the colors, to add more of the pink- coral color, and glitter. (I think I learned that from a YouTube video.)

I think I used way too much polish, and therefor I used both of my fast drying top coats: L.A.Color (Rapid Dry) and Cult Nails (Wicked Fast). I made one gradient before this one. And that one got ruined after 30 min. when I had to do the dishes, even though I used gloves. So that's why. What I did then, that I didn't do now, was to add a top coat before the glitter. I think that would have evened out the colors even more. I included one photo of my first attempt, because it shows the transformation of the Kleancolor polish so well:

Making of the first Sunset/ Fall gradient
Above you see the effect of one coat on the two fingers to the right. And below is the finished second attempt again.

Sunset/ Fall gradient nails with Kleancolor #228 Chunky HoloCandy


About the sponge:

I have seen that most of you use a makeup sponge. This is a car sponge. :-) My friend gave me his two backup car sponges to use for nail art. He is so kind. I cut off a piece of the sponge, and it worked well. And next time I use it, I just cut off the part with dry nail polish. But if I was making a gradient that I wasn't going to cover with glitter, a finer sponge would possibly have been better.

Making of Sunset/ Fall gradient


This gradient was meant to be the base for my Hawaii nails, but I liked it so much that I wore it like this for many days before I started stamping on them. This manicure by Susy in Color, that again was inspired by this manicure by Pshiiit was my main inspiration.

Lani

0 comments:

September haul


Hello everyone!
September haul


I got the last two polishes I ordered in the mail yesterday :-), so I thought I might as well tell you what I bought, because I don't think I will buy more this month. And I've started using some of the polishes already. Let's take a closer look at what I bought:


Konad:
September haul


I actually ordered the Konad starter set and and the black and red stamping nail polish in August, but it took a very long time to get here. (I thought I would need it for the KKCenterHk stamping plates, but I just needed stamping polish.)
Konad: red & black stamping polish, stamping nail art set


The set comes in a beautiful box with photos of advanced nail art and instructions. It includes a stamper and scraper, a stamping plate with flower images, and a mini bottle (5ml) of white stamping polish. I haven't started using it, but I've used the red and the black stamping polish (11ml). You can see the red used here and here. Stamping nail art is (as many of you know) a Konad invention. How does someone get those good ideas? I guess I would be rich if I knew...

Lindex:
September haul
Unknown brand: #11. This polish has no name on it, only the number, and it was in a display with no name. I bought it at Lindex, and I will update this post with the name of the manufacturer when they answer my mail.

I was very curious about this one, because it looks purple with teal or blue shimmer in the bottle, (and I expected it to be a dark cousin of RBL Scrangie,) but on the nail it looks blue. I have taken photos of it many weeks ago, but not had time to write the post.
Bottle size: 10ml.

Nail stickers:
I also bought these nail stickers that day at the mall, but in a another shop. And now I can't find them, so I had to use this photo.

Gosh:
September haul


I have shown you Gosh # 549 Holographic Hero, and used it as base color for my Black butterfly post. Bottle size: 8ml.
I managed to buy one more a few days later. I thought it was too late, but when I asked, the owner of the shop found it in a drawer! :-) :-) :-)

Kleancolor:
Kleancolor: Chunky Holo Nail Lacquer Mini Collection; #228, #230, #232, #233, #234, #236 


I know these bottles look big, but they are very small; 5ml. When I don't have a chance to see what a nail polish looks like, I prefer to order mini bottles. Especially if it is expensive. But this time I paid more for the shipping than for the set itself.
September haul

I didn't know that I am a girl "who knows her fashion statement is trendier than others" until I read Kleancolor's statement! :-)

On the back of the box you can also see the names of the bottles above (left- right):
#228 Chunky Holo Candy
#230 Chunky Holo Fuchsia
#232 Chunky Holo Clover
#233 Chunky Holo Teal
#234 Chunky Holo Purple
#236 Chunky Holo Black

These are jellys with small glitter, except for Chunky Holo Black, that has big holographic orange/green glitter. I have wanted CH Purple and CH Black since I saw them on a blog about a year ago. But when I got the set, I fell in love with Candy. I have been wearing it for days. It looks orange above, but it's actually more pink.


Linda Johansen:
Linda Johansen Nail Candy: Razzle Dazzle

Linda Johansen is the new name on my Cruelty- free list! :-) Linda Johansen has started her own cosmetics company, and her line of nail polish is called Nail Candy. EDIT: I had written that Razzle Dazzle is a purple with holographic glitter, but I think it is better to describe it a scattered holographic. I have tested it on a nail wheel, and was surprised that the holo shows best in the shade. According to Neglelakkmani this discontinued shade is now back in stock because many asked for it. I have struggled to get this polish. Bottle size: 11 ml.

Orly:
September haul


These two are actually new/ released this summer. They are from the Flash Glam FX collection, that you might have seen on My Simple Little Pleasures after she won it.
September haul

I'm going to keep these little boxes in case I'll need them. What a clever way to pack nail polish bottles!
Orly: Rockets Red Glare, Sunglasses at Night

Rockets Red Glare: red small and big hexagonal glitter in a clear base
Sunglasses at Night: dark base with holographic bar glitter
These bottles are huge; 18 ml!

This is my first big red glitter, and I really wanted bar glitter after having seen both this one and vintage bar glitter on blogs the last months. I have a bar glitter (H&M Purple Glaze) that I bought in August, but that glitter is so tiny that you barely see the different shapes of it.


Lani

0 comments:

Golden Rose Matte Velvet 101 - Blue & Silver saran wrap mani

I'm back from my vacation and I have another saran wrap mani for you guys, this time it's blue and silver. I apologize for the quality of these pics, they are really not as good as I hoped, but the weather has made it quite impossible to get good pics. Anyhow, here's the manicure:

So I used Golden Rose Matte Velvet number 101 (blue) and Royal Cosmetic Connections number 92 for this mani. Again, I really liked this effect, it is quite subtle, but you can still see that there's something more going on than just a regular one color manicure. And like I said before, this is really such an easy way to make your manicure more interesting, it takes only couple minutes to spice up your mani with this technique. So I really love the saran wrap mani technique and I think I'll be using it again and again, because I want to try some other color combinations too.

Orly Bonder
 Golden Rose Matte Velvet #101 (two coats)
Royal Cosmetic Connections #92 (one coat)
China Glaze Fast Forward


I also wanted to show you the polish that I used as the base for this mani:
So this is the Golden Rose Matte Velvet #101 and I have to say I really liked this polish. I bought this from sale (it was something like 1 euro) just to try and see if it would be something I would like and I have to say I was pleasantly surprised. It had quite nice quality, it needed two coats to be opaque and I really like this semi-matte finish that it has.

0 comments:

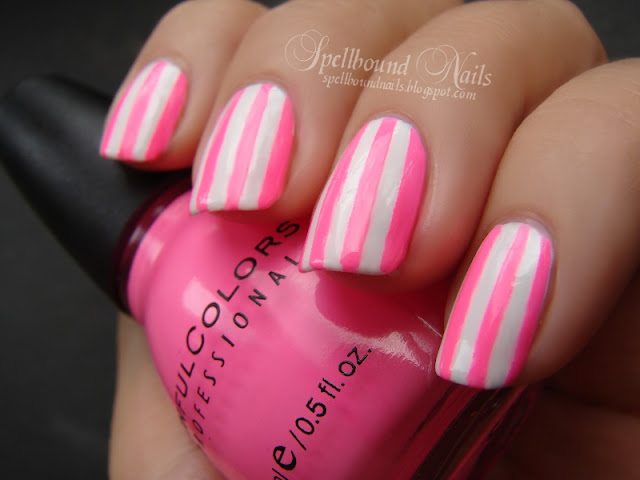
Neon Pink Stripes

I thought I should get all the neon out of my system before I have to pull out the Fall colors. So here goes ...


nails nailart nail art mani manicure Spellbound Sinful Colors China Glaze White Pink neon hot bright stripes tape black taped ragged drip run tips

I am ashamed to say I have absolutely no idea what the name of this pink is. It is my sister's nail polish that accidentally got mixed in with mine. I couldn't resist using it before I gave it back to her. For some reason, she took the name sticker off the bottom. Seriously? Who does that??? Though looking at swatches it may or may not be either Sinful Colors Fusion Neon or 24/7.


nails nailart nail art mani manicure Spellbound Sinful Colors China Glaze White Pink neon hot bright stripes tape black taped ragged drip run tips

The name of this color aside it is a beautifully bright pink. What better use for a pink this bright than doing stripes with China Glaze White on White?


nails nailart nail art mani manicure Spellbound Sinful Colors China Glaze White Pink neon hot bright stripes tape black taped ragged drip run tips

How about taking it one step further? This was done with the help of some weird cut scissors. I put a piece of tape on some wax paper and cut it down the middle with ragged cut scissors. Cutting the tape down the middle let me have enough tape for two nails. I angled the tape just slightly on my nails and painted over with black. I think this created a really awesome pattern. It almost looks like the black is running down my nails in some spots. I can already see a few more uses for these scissors.

How do you feel about using weird cut scissors as part of a tape mani?

0 comments:

HauteLook and Orly

I'm not sure how many of you are already signed up for HauteLook, but if you're not already you really should be. Until Saturday 8AM Pacific time, HauteLook will have Orly nail polishes for $4.50. Halloween Creme and Halloween Glitter are $9.00 and the 6 set Romance Collection is only $27 compared to it's usual price of $51! There are also a few others at various prices. This is a steal in my opinion given that Orly is usually $8.50 a bottle. I have very few Orly in my collection due to their price and my small nail polish budget. So, at this price I already have 6 in my cart. :)

Well, I'm off to place my order, just thought I would let you guys know about this awesome deal in case you want to add some Orly to your collection too.

0 comments:

Black butterfly nails


Hello everyone!

(If the photos appear to be too far to the right, please use Google Chrome!)
Black butterfly nails, N.NAIL- DRN276, from KKCenterHk


This is what I made with my black butterfly modelling clay from KKCenterHk. As you see, I also stamped 3 flowers on my ring finger. And among the photos below, you will see a flower on my thumb too. As a base color for this nail art, I used Gosh #549 Holographic Hero.
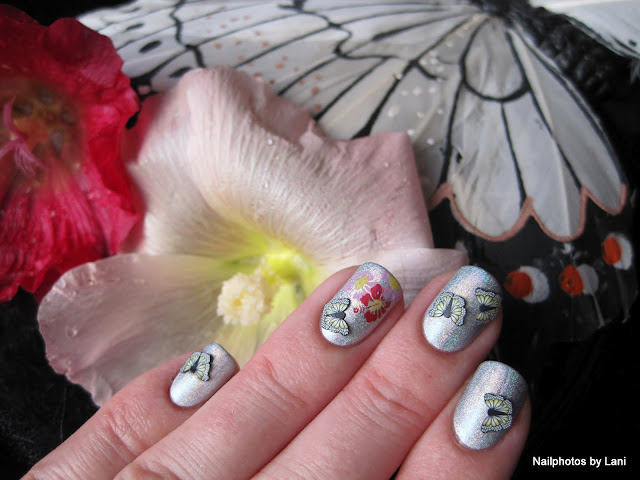


Black butterfly nails, N.NAIL- DRN276, from KKCenterHk


Black butterfly nails, N.NAIL- DRN276, from KKCenterHk

Black butterfly nails, N.NAIL- DRN276, from KKCenterHk


Black butterfly nails, N.NAIL- DRN276, from KKCenterHk
I was already wearing Gosh: Holographic Hero with top coat, and stamped the flowers on with red stamping polish and pink polish (Gosh Bubblegum), and painted the center of the flowers yellow (with H&M Rising Sun). On my ring finger and thumb I did the stamping before I placed the butterflies, to get enough room for the stamper on my nail. I used the image below three times, but put polish only on the flower, not on the text.
Black butterfly nails, N.NAIL- DRN276, from KKCenterHk


I was so eager to place the butterflies, that I had already done that on the other nails... It was very quick and easy. But let's go back in time, and start at the beginning.
(For more photos, scroll down!)

Here is the bag of black butterfly modelling clay for nail decorations, that you saw I got from KKCenterHk in this post. I feel very lucky that I got three pieces, and not just one sample.
Black butterfly nails, N.NAIL- DRN276, from KKCenterHk
You need a sharp knife to cut the clay in as thin slices as you can. I prefer to use a scalpel.
Black butterfly nails, N.NAIL- DRN276, from KKCenterHk

And soon, you will see that you have enough for more than one manicure.

Black butterfly nails, N.NAIL- DRN276, from KKCenterHk

Black butterfly nails, N.NAIL- DRN276, from KKCenterHk

Now that the butterflies are ready to use, you can sort them if you want. Because this was my first time to use this kind of clay, I choose to do the cutting some days before I made the nail art. Therefor I sorted the little butterflies, so that I packed the thinnest and most even slices in aluminium foil, and put everything back in the plastic bag. It's nice to have that bag for storage.

Then, when I had time for nail art, I had painted my nails the day before, and I could just get the three little bags I needed; the stamping plate, the aluminum packet, and the stamper and scraper, and a few more things:

Black butterfly nails, N.NAIL- DRN276 and SPPMB26 and stamper and scraper, from KKCenterHk
What I used to make the flowers:

stamping plate with flower images- I used N.NAIL SPPMB26 from KKCenterHk
stamper and scraper- (gift from KKCenterHk)
red stamping polish
pink stamping polish (I used a pink regular polish that had become too thick)
yellow sheer nail polish (for the center of the flowers, and used a sheer polish not to cover the image)
nail polish remover, cotton swabs (to clean the stamping equipment)


This is what you need to place the black butterflies:

base coat (to use as glue)
dotting tool (to pick up and place the butterflies)
tweezers (to press down after placing each butterfly)
thin slices of black butterfly modeling clay- I used N.Nail Black Butterfly Modelling Clay Nail Decorations (N.NAIL- DRN276) from KKCenterHk
top coat (will help as glue)

Black butterfly nails, N.NAIL- DRN276, from KKCenterHk

Black butterfly nails, N.NAIL- DRN276, from KKCenterHk


How to place the butterflies: 

What I did first was to put the butterflies where I wanted them, and move them around to see what would look beautiful.
*Just use the brush to put a little base coat where you want one butterfly to be.
*Dip the end of the dotting tool in the wet pool of base coat, touch a butterfly, and it will stick to the dotting tool so that you can put it on the right spot. You have time to move it a little if you need to do that.
*Use the tips of the tweezers to press on both sides of the butterfly until the glue/ base coat dries. (I learned to use the tweezers like this from a tutorial by Cutenails. You can use your finger instead of tweezers, but it's easy to get wet polish on it.)
*After you have done that with all the butterflies, seal everything with top coat. If not, the butterflies will begin to loosen after a few hours. In that case, just put base coat under the edge, and press down again, and seal with top coat.
Black butterfly nails, N.NAIL- DRN276, from KKCenterHk


Black butterfly nails, N.NAIL- DRN276, from KKCenterHk


I was afraid of getting bubbles and to smear my stamped image, and have therefor also taken photos before applying top coat. I decided to use some of the first photos too, so some pictures are with and some are without top coat.

Black butterfly nails, N.NAIL- DRN276, from KKCenterHk

Black butterfly nails, N.NAIL- DRN276, from KKCenterHk

Black butterfly nails, N.NAIL- DRN276, from KKCenterHk


Black butterfly nails, N.NAIL- DRN276, from KKCenterHk

Black butterfly nails, N.NAIL- DRN276, from KKCenterHk


Black butterfly nails, N.NAIL- DRN276, from KKCenterHk


How to remove the butterflies:

When I had used nail polish remover, the butterflies stayed on the nail:
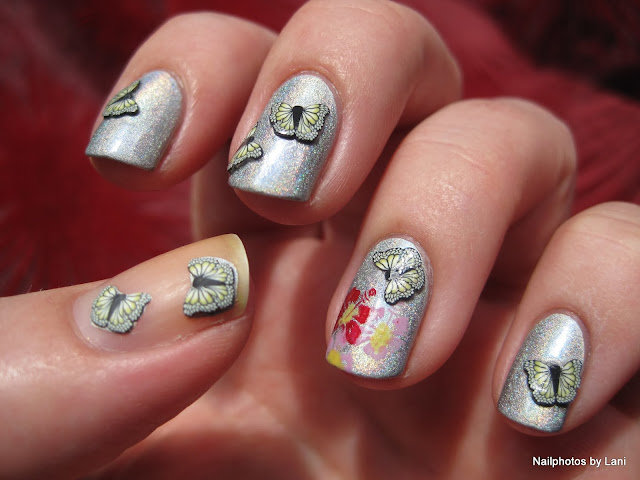
Black butterfly nails, taking off N.NAIL- DRN276, from KKCenterHk


But they came off immediately when I used my nail to bend them off:

Black butterfly nails,  how to remove N.NAIL- DRN276, from KKCenterHk

I was surprised that only one got ruined and that they still felt soft. But I don't know if they can be used several times.
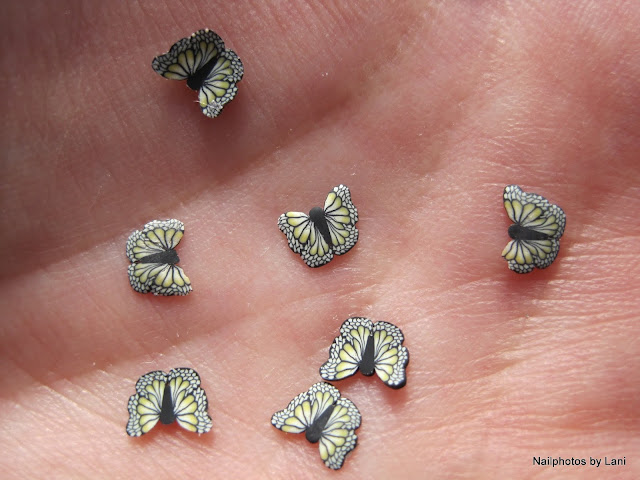
Black butterfly nails, used butterflies N.NAIL- DRN276, from KKCenterHk


More photos of the finished manicure:
Black butterfly nails, N.NAIL- DRN276, from KKCenterHk


Black butterfly nails, N.NAIL- DRN276, from KKCenterHk

Black butterfly nails, N.NAIL- DRN276, from KKCenterHk


If you want to buy something from KKCenterHk, you can use my coupon code and get 10 % off.
Coupon code: Nailphotos by Lani
The code ends: 31st, January, 1213
To go to KKCenterHk's web shop, just click on their banner below:


I was surprised by how quick and easy it is to change a manicure using this kind of modelling clay. I love my little black butterflies, so I'm glad I have many left.

Lani

0 comments: