Whiten Your Nails At Home (Tutorial)
I don't know about you, but no matter how well my base coat works, after all this nail art my nails start to look yellow. I finally got fed up with this yellowing last month and searched all over the internet for a DIY whitening. And I found one, a really good one, and I'm going to share it with you!The ingredients are simple! You just need some baking soda and some hydrogen peroxide. It doesn't matter how much or how little you pay for these. I had some brand name baking soda and some Rite Aid peroxide on hand so I decided to use them. So, don't feel bad about getting off brand products if you're on a budget! Just make sure your peroxide is 3%. If you can't find 3% listed on the front, check the active ingredients list; hydrogen peroxide should be listed there as 3%.
You'll need a bowl or a cup. I've tried both and found I preferred the bowl but will go with a slightly smaller bowl next time. You'll get a whiter look if you have something to scrub your nails with. I used an old, soft toothbrush.
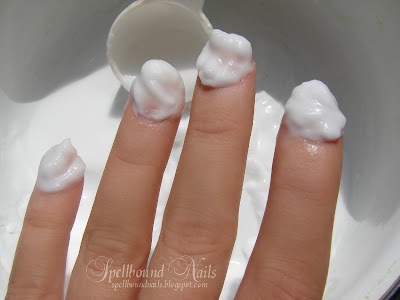
The original instructions said to make a paste from 1 teaspoon of peroxide and 2 1/4 teaspoons of baking soda. However, I found this mixture was too runny to call a 'paste' so I simply dumped in more baking soda and peroxide until I had a suitably thick paste, as seen in the picture above. Keep in mind that your body heat will cause the paste to melt slightly.
Simply wash your hands and nails of the remaining paste and they should be noticeably whiter. I recommend putting on a good hand and nail cream after this.
Here are my nails before ... very yellow at the tips especially around my nail line ...
And here are my nails after two whitening treatments done over two weeks, one a week.
From some of the other recipes I found during my search you can add a small amount of lemon juice to this mixture to speed up whitening. I didn't have any lemons on hand so I couldn't try this. I will say that I had a small amount of pain and irritation under some of my nails after soaking them. The irritation faded quickly but I'm not sure how adding lemon would affect this. Certainly don't use this, with or without lemon, if you have any cuts or open wounds on or around your hands!
I would love to know if you try this recipe and if it works for you. I would also love to know if you know of a better one!


.jpg)


.png)

0 comments: